Sujet : : Art & Culture
: marketplace-membership : One
Tags : vector
author_user_id : 78156526
image-key-features : 
isFree : none
isLastAdded : 1
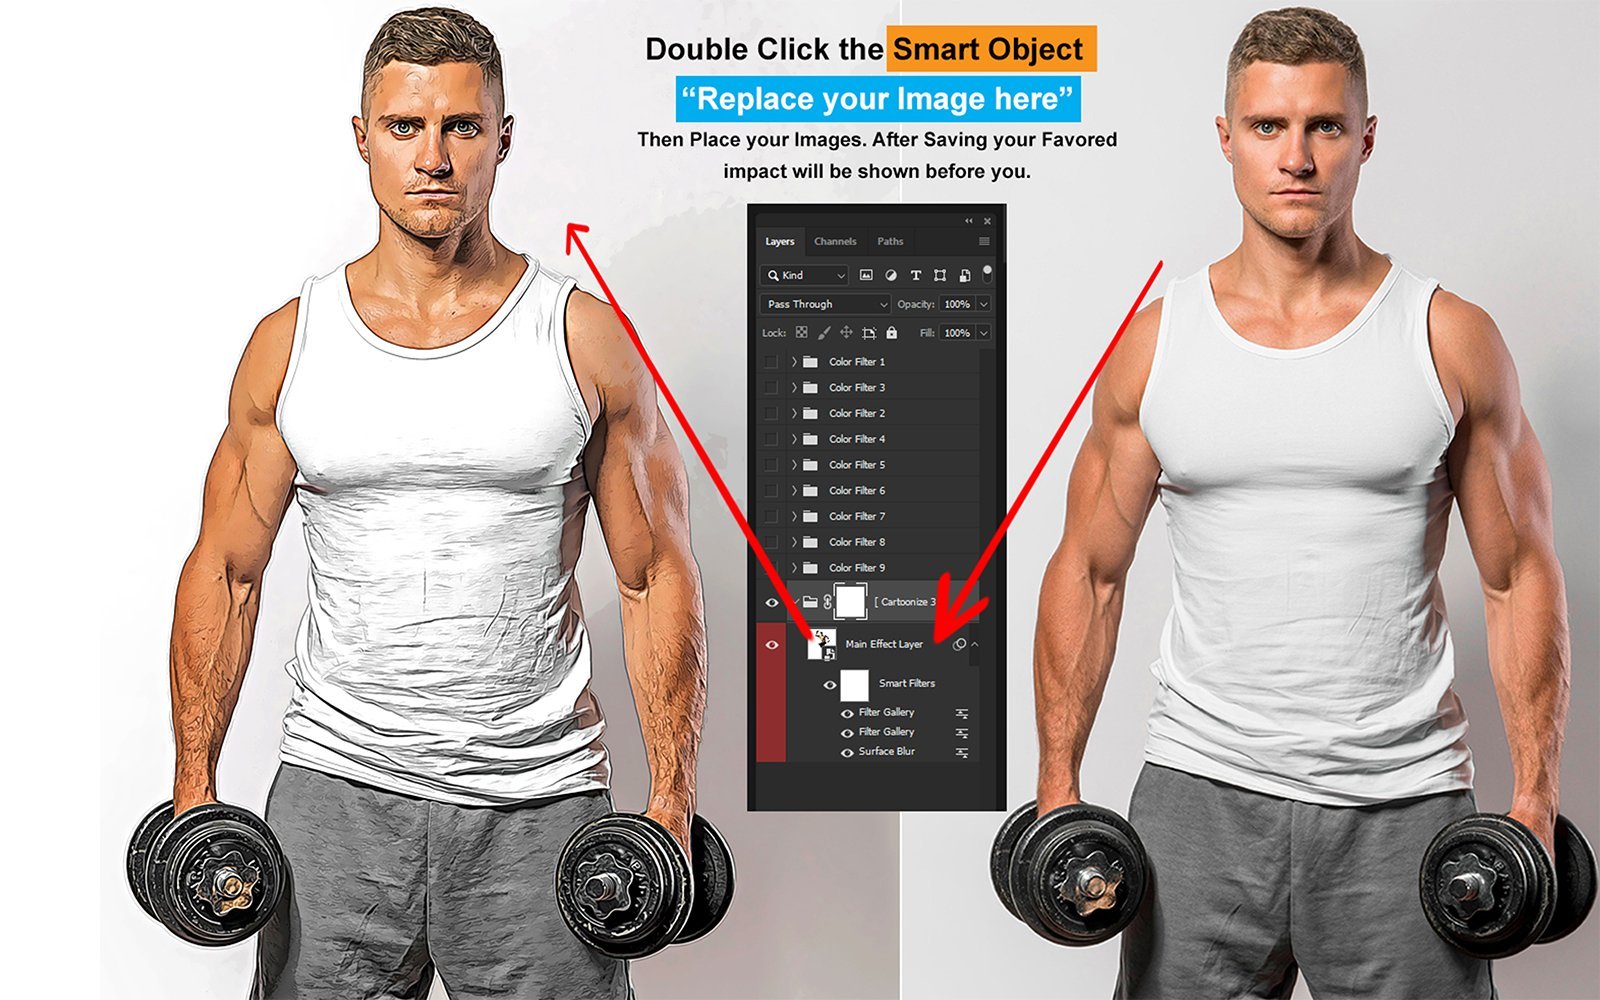
Nom du template : : Photoshop Effect Cartoonizer
: Preview screens or video URLs : 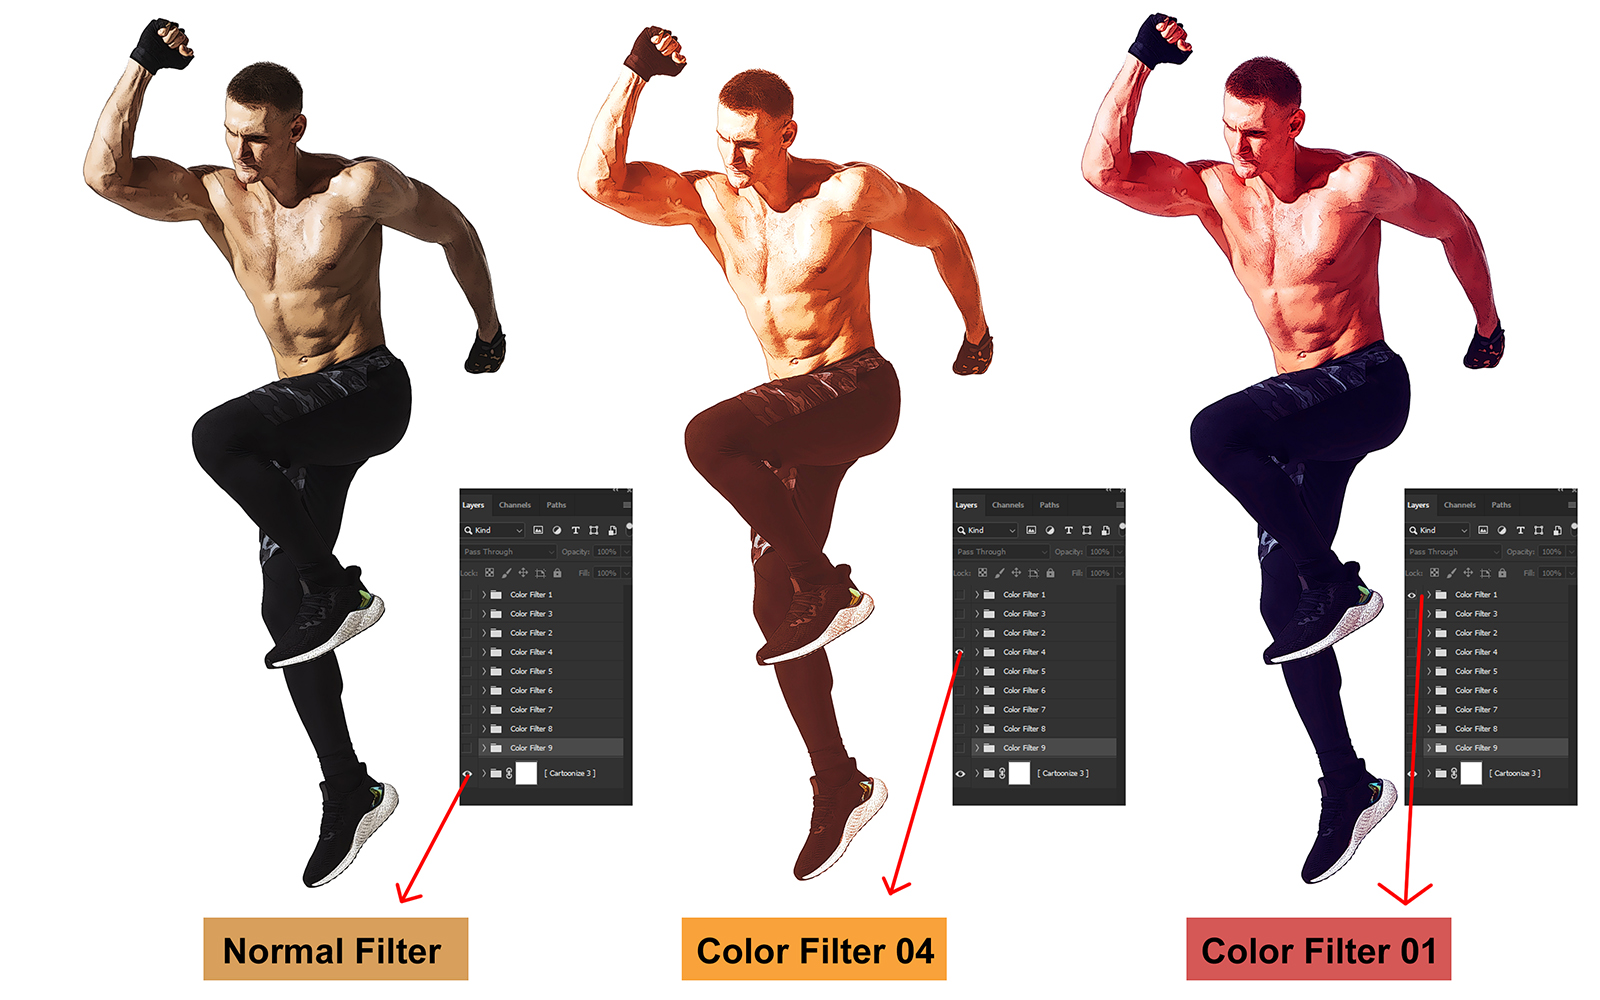
Description : 95: The Cartoonizer Photoshop Effect is a digital image manipulation technique that transforms photographs or images into cartoon-like representations. This effect can be achieved through various methods and filters available in Adobe Photoshop or other image editing software.
Here's a general description of the process:
- Select Image: Choose the photograph or image you want to cartoonize and open it in Photoshop.
- Duplicate Layer: Duplicate the original image layer to preserve the original while applying the cartoon effect to the duplicate layer. This can be done by right-clicking on the layer and selecting Duplicate Layer.
- Apply Posterize Filter: Go to the Image menu, then Adjustments, and select Posterize. This filter reduces the number of colours in the image, creating a more simplistic, graphic appearance. Adjust the levels to achieve the desired cartoon effect. Higher levels will result in fewer colours and more defined edges.
- Apply Gaussian Blur: To soften the transitions between colours and create a smoother cartoon-like effect, apply a Gaussian Blur filter. Go to the Filter menu, select Blur, and then Gaussian Blur. Adjust the radius until you achieve the desired level of smoothness.
- Adjust Levels and Contrast: Use the Levels adjustment tool (found in the Image menu under Adjustments ) to fine-tune the contrast and brightness of the cartoonized image. This step helps enhance the overall appearance and clarity of the cartoon effect.
- Add Outline: If desired, add a black outline to the cartoonized image to enhance the effect. This can be done by duplicating the cartoonized layer, applying a stroke effect to the duplicate layer (found in the layer styles options), and then adjusting the stroke size to create a visible outline.
- Final Touches: Make any additional adjustments to colour, saturation, or other effects to customize the cartoonized image to your liking.
- Save and Export: Once satisfied with the cartoon effect, save your work in the desired file format.
By following these steps and experimenting with different settings, you can create various cartoon effects ranging from subtle to highly stylized.
advImage : 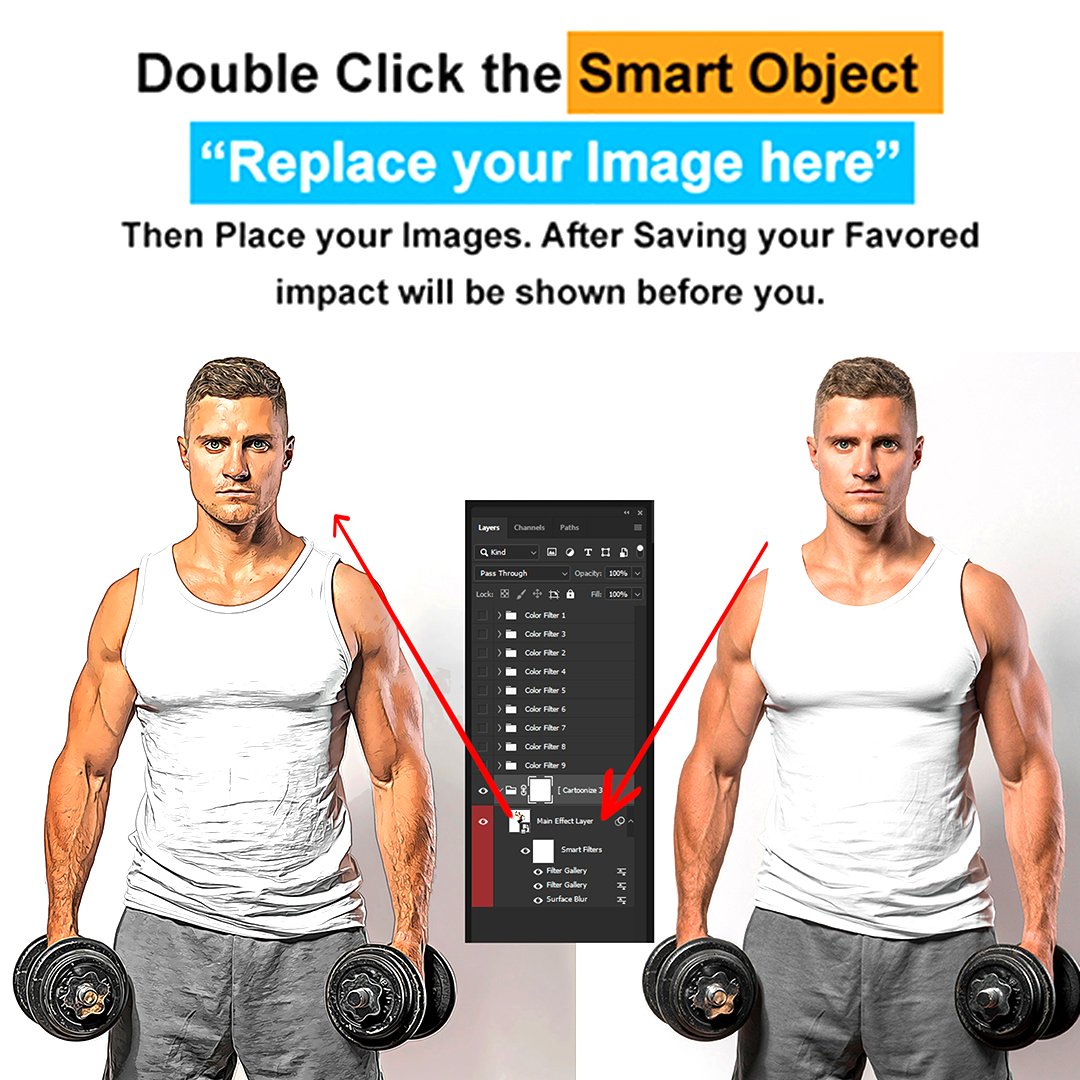
Type de Graphiques : Raster
Compatibilitť : Adobe Photoshop
Fichiers Inclus : PSD
Extrait : 8: Learn how to use Photoshop to create cartoon effects from photos with filters and adjustments.
Learn how to use Photoshop to create cartoon effects from photos with filters and adjustments.
Famille de produit : None
template-icon : icon-illustrations
Types : Illustrations ;